Creating Advanced ASP.NET MVC Controls (Part 3, A Scheduler)

Purpose
This is part 3 of a series going through the process of creating an advanced control for the ASP.NET MVC system. I've decided to create a schedule control that allows a user to schedule and item on a calendar control as well as add some meta-data information to the scheduled date. Together with the debugger we have built, this should not be too difficult
Getting Started
Whenever I start building a new control, I simply go commando-style and write the html, css, and javascript first to make sure everything looks good on that end. This helps me with debugging.
The Markup
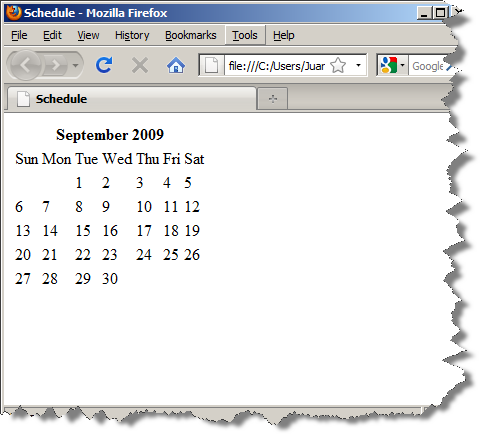
First things first: the html. I like to do calendars this way:
<table class="scheduler_month">
	<tr class="scheduler_month_header">
		<th colspan="7">September 2009</th>
	</tr>
	<tr class="scheduler_days_header">
		<td>Sun</td>
		<td>Mon</td>
		<td>Tue</td>
		<td>Wed</td>
		<td>Thu</td>
		<td>Fri</td>
		<td>Sat</td>
	</tr>
	<tr class="scheduler_month_days">
		<td class="scheduler_month_invalid_day"></td>
		<td class="scheduler_month_invalid_day"></td>
		<td class="scheduler_month_day">1</td>
		<td class="scheduler_month_day">2</td>
		<td class="scheduler_month_day">3</td>
		<td class="scheduler_month_day">4</td>
		<td class="scheduler_month_day">5</td>
	</tr>
	<tr class="scheduler_month_days">
		<td class="scheduler_month_day">6</td>
		<td class="scheduler_month_day">7</td>
		<td class="scheduler_month_day">8</td>
		<td class="scheduler_month_day">9</td>
		<td class="scheduler_month_day">10</td>
		<td class="scheduler_month_day">11</td>
		<td class="scheduler_month_day">12</td>
	</tr>
	<tr class="scheduler_month_days">
		<td class="scheduler_month_day">13</td>
		<td class="scheduler_month_day">14</td>
		<td class="scheduler_month_day">15</td>
		<td class="scheduler_month_day">16</td>
		<td class="scheduler_month_day">17</td>
		<td class="scheduler_month_day">18</td>
		<td class="scheduler_month_day">19</td>
	</tr>
	<tr class="scheduler_month_days">
		<td class="scheduler_month_day">20</td>
		<td class="scheduler_month_day">21</td>
		<td class="scheduler_month_day">22</td>
		<td class="scheduler_month_day">23</td>
		<td class="scheduler_month_day">24</td>
		<td class="scheduler_month_day">25</td>
		<td class="scheduler_month_day">26</td>
	</tr>
	<tr class="scheduler_month_days">
		<td class="scheduler_month_day">27</td>
		<td class="scheduler_month_day">28</td>
		<td class="scheduler_month_day">29</td>
		<td class="scheduler_month_day">30</td>
		<td class="scheduler_month_invalid_day"></td>
		<td class="scheduler_month_invalid_day"></td>
		<td class="scheduler_month_invalid_day"></td>
	</tr>
</table>
This comes out looking like:
Styles...
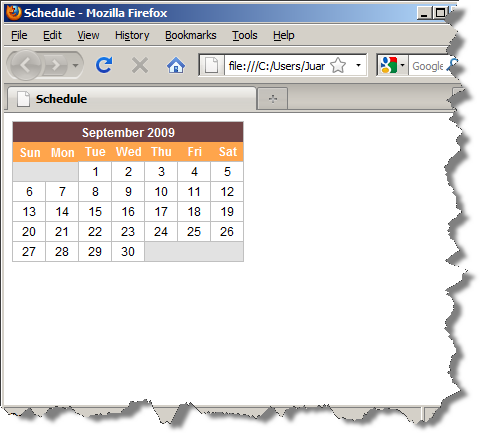
It looks pretty good as a starting point. With a little css we can actually make it look good (Disclaimer: I write programs and thus cannot be trusted with what "looks good"):
.scheduler_month
{
	border: solid 1px #C0C0C0;
	border-collapse: collapse;
}

.scheduler_month_header th
{
	background: #714546;
	color: white;
	height: 20px;
	width: 210px;
	font-size: 12px;
}

.scheduler_days_header td
{
	background: #FFA54C;
	color: white;
	height: 20px;
	width: 30px;
	font-size: 12px;
	text-align: center;
	font-weight: bold;
}

.scheduler_month_invalid_day, .scheduler_month_day
{
	height: 20px;
	width: 30px;
	font-size: 12px;
	text-align: center;
	border: solid 1px #C0C0C0;
}

.scheduler_month_invalid_day
{
	border: none;
	background: #E2E2E2;
}
Here is the outcome:
Functionality?
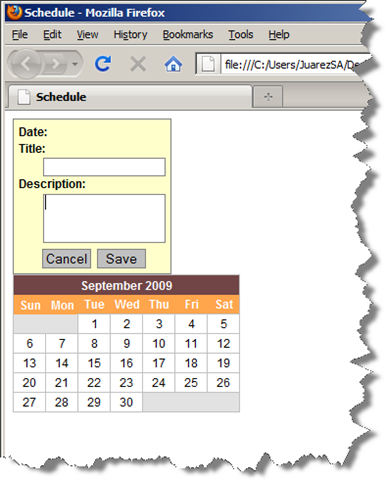
The goal of the control is to save/edit data for each day and mark the calendar if there is any associated data with the day. In order to do this, we need to have a mini-form to take and display data:
<div id="DayData">
	<div class="label">Date:</div>
	<div id="DayCurrent" class="input"></div>
	<div class="label">Title:</div>
	<div class="input"><input type="text" id="DayTitle" name="DayTitle"/></div>
	<div class="label">Description:</div>
	<div class="input"><textarea id="DayDescription" name="DayDescription"></textarea></div>
	<div class="button">
		<input type="button" value="Cancel" id="DayCancel" name="DayCancel" />
		<input type="button" value="Save" id="DaySave" name="DaySave" />
		<input type="hidden" id="DayId" name="DayId" />
	</div>
</div>
This little number has the visible textboxes where the interaction takes place as well as a hidden field that will allow us to maintain state (DayId). Adding some more styles we end up with:
Do some work already!
Now for some jQuery magic! We want to display the mini-form, gather data, and persist it (at least on the client side for now). Some JavaScript first:
$('.scheduler_month_day').click(function(event) {
	var id = this.id;

	// proper date object
	var d = convertDate(id);

	// put in value (if exists)
	var index = window.Changes.find(function(x) { return x.Id == id; });
	if(index > -1) {
		$('#DayTitle').val(window.Changes[index].Title);
		$('#DayDescription').val(window.Changes[index].Description);
	} else {
		$('#DayTitle').val('');
		$('#DayDescription').val('');
	}

	// set the id to proper cell reference
	$('#DayId').val(this.id);
	$('#DayCurrent').text(d.toDateString());

	// make it look nice when we show it
	if(!$('#DayData').is(':hidden'))
		$('#DayData').fadeOut('fast').hide();

	$('#DayData')
		.css({left: event.clientX + 10, top: event.clientY + 10})
		.fadeIn('slow').show();
});


window.Changes = new Array();
$('#DaySave').click(function() {
	// get values
	var id = $('#DayId').val();
	var title = $('#DayTitle').val();
	var desc = $('#DayDescription').val();

	// already in there?
	var index = window.Changes.find(function(x) { return x.Id == id; });

	// do appropriate thing if it already exists
	if(index == -1)
		window.Changes.push({ Id: id, Title: title, Description: desc });
	else
		window.Changes[index] = { Id: id, Title: title, Description: desc };

	$('#' + id).addClass('scheduler_month_day_data');

	// close win
	$('#DayData').fadeOut('fast').hide();

	// make sure everything is ok
	if(window.isDebug)
		_(window.Changes).clear()
			.write('Current Change Set');
});
Explanation
Note that the crux of the code does the following:
- Fill in form data (if it exists)
- Save or update data (depending on whether or not it exists in the first place)
The magic is on line 31 where there is a global array that maintains all of the changes. This is where the debugger comes in handy. It allows us to visualize what data has been persisted on the client side. On line 8 and 39 there is an interesting function worthy of mentioning. What I have done is "extend" the functionality of the Array object by adding:
Array.prototype.find = function(x) {
    for (var i = 0; i < this.length; i++) {
        if (typeof (x) == 'function' && x(this[i]))
            return i;
        if (this[i] == x)
            return i;
    }
    return -1;
};
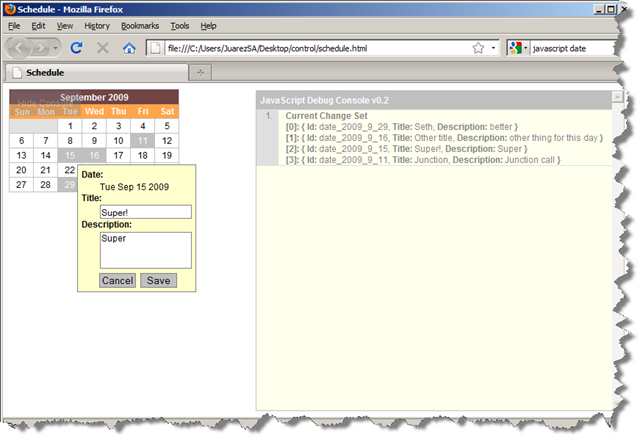
The primary job is to figure out if the array has an element in it or not. Either a value or a function can be passed in. Naturally I chose the function parameter since we are dealing with an array of objects. What it does is tell me if the save is an update or an addition. Looking the the control code again, we can see this happening on lines 9 and 42. It decides what to do if the item does not exist by using the DayId (line 18) that we save and later retrieve. Here is a picture of the whole thing (debugger and all):
Where to from here?
So now what? This control is all nice and all, but here are some things left to do:
- Make the thing more generic (i.e. it needs to be able to represent any month or number of months)
- Get initial data from persistent storage (i.e. auto populate values)
- Save changes to persistent storage
A word about the debugger...
I have made some minor changes to the debugger. They revolve mainly around usability. It is also important to note that if you try to visualize deep objects using the debugger, you will stall your browser. It is designed for small-ish things (remember it was like a 2-4 hour thing I made) so if it hangs on you, you've been warned
Code Already
I would love feedback on the code. Are there any ommissions/improvements/rants/raves/etc.? Hope this has been helpful!
Your Thoughts?
- Does it make sense?
- Did it help you solve a problem?
- Were you looking for something else?